Adjustable Roll Feeding Common V Bottom Paper Bag Machine With Tracking + 2 Colors Printing Online

Model:XKJD-400

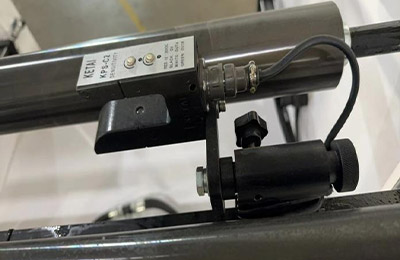
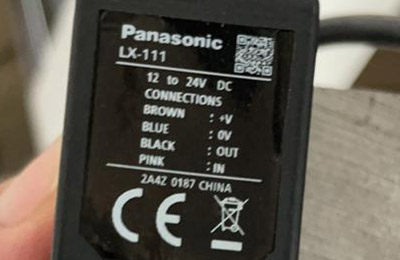
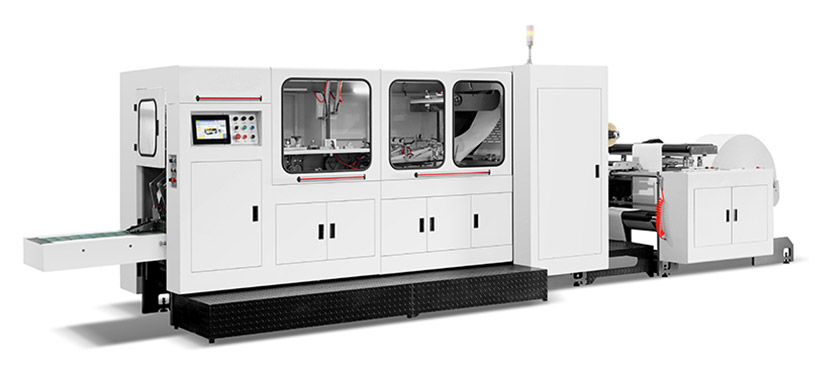
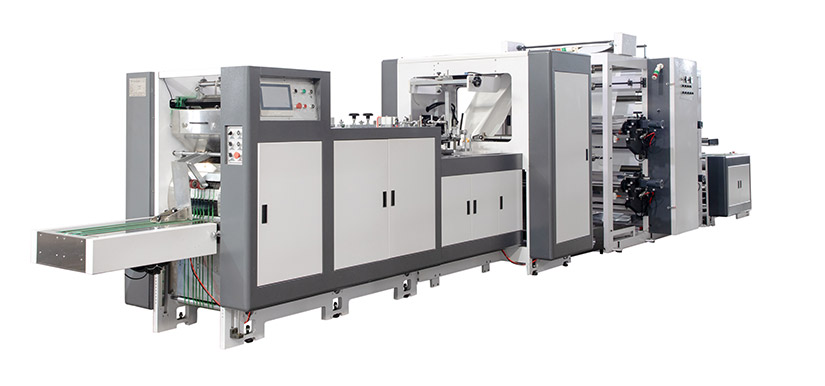
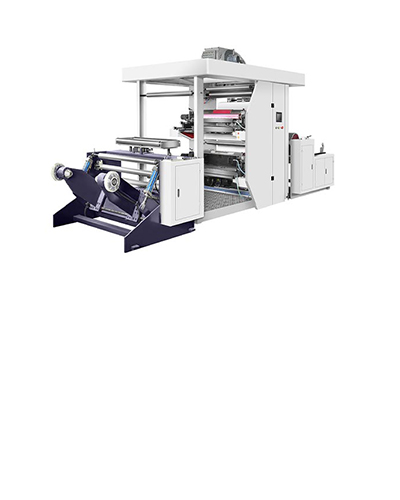
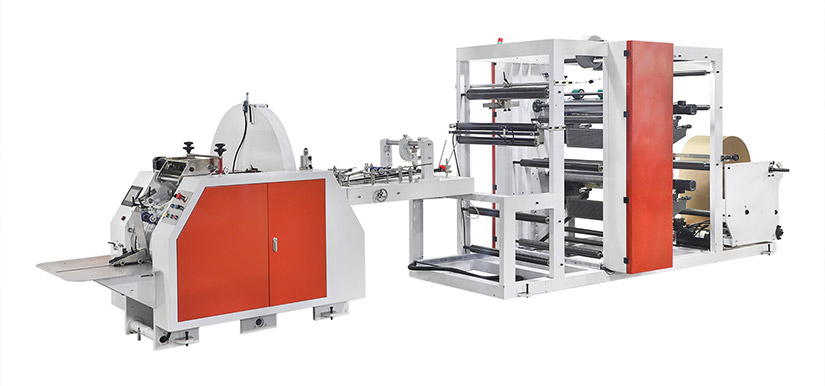
XKJD-400 Adjustable Roll Feeding Common V Bottom Paper Bag Machine With Tracking + 2 Colors Printing Online combines multiple functions, adopts PLC control system and photoelectric detection device, and automates production to ensure high quality and high efficiency of paper bag production.

Bag Length: 120-480mm

Bag Width: 70-260mm

Paper Thickness : 40-80g/㎡

Machine Speed : 60-400pcs/min


Adjustable Roll Feeding Common V Bottom Paper Bag Machine With Tracking + 2 Colors Printing Online
Product Applications
Product Description
Paper Bag Machine Product Introduction


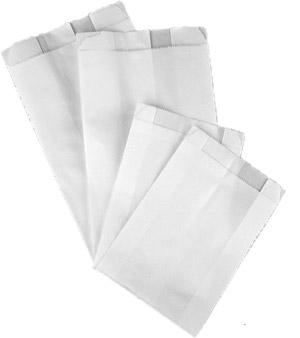
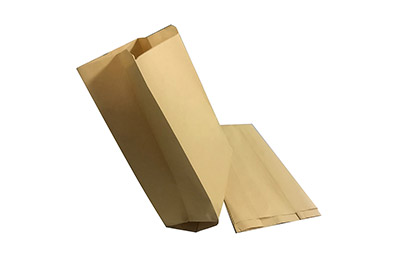
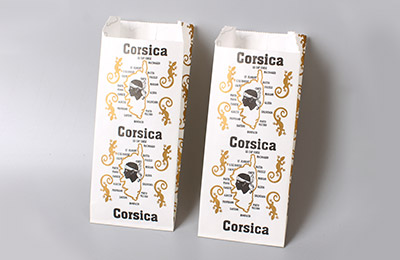
Adjustable Roll Feeding Common V Bottom Paper Bag Machine With Tracking is used for primary color paper or printed web paper. It is used to make paper bags with pointed bottom at one time.

Adjustable Roll Feeding Common V Bottom Paper Bag Machine With Tracking can be used in various paper bags with high speed and efficiency. It is an ideal equipment for paper bag production.

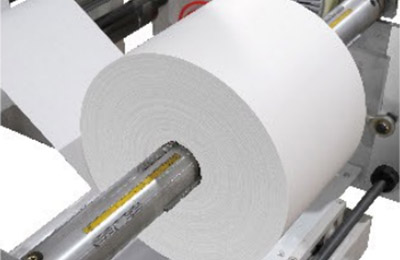
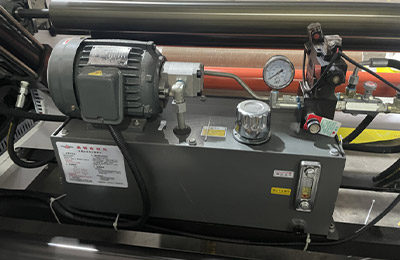
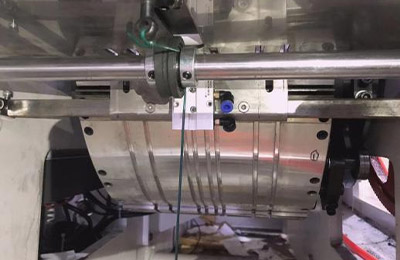
Adjustable Roll Feeding Common V Bottom Paper Bag Machine With Tracking is composed of drum feeding (hydraulic feeding, automatic deviation correction, tension adjustment), side gluing,printing paper electric eye tracking,

base paper into cylinder, fixed-length drawing cutting, bag bottom indentation opening, bag bottom gluing forming, bag out finishing and so on.

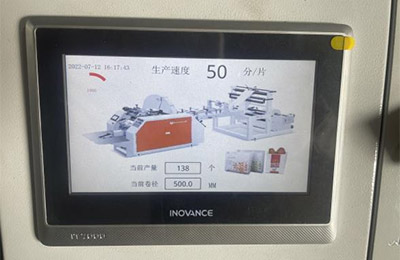
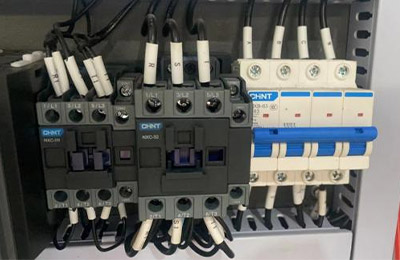
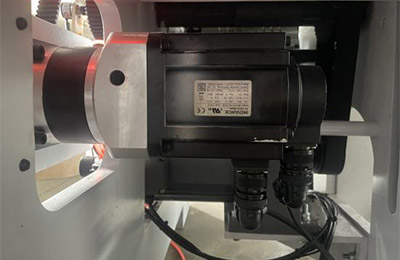
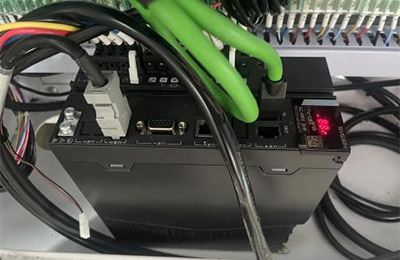
The whole machine is controlled centrally by PLC touch screen and servo motor controls the length of paper bag.


Paper Bag Machine Features

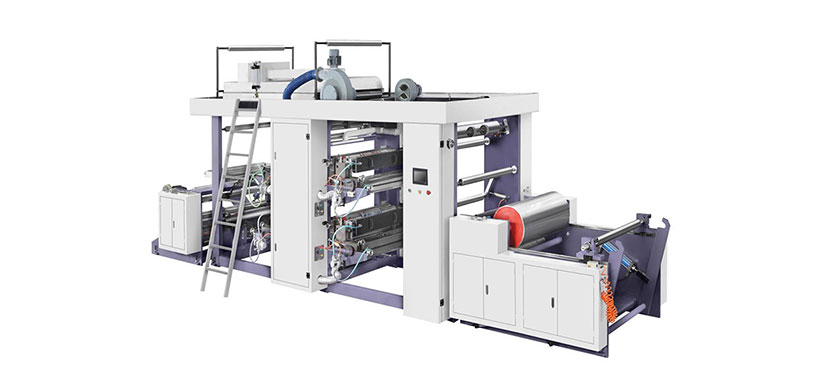
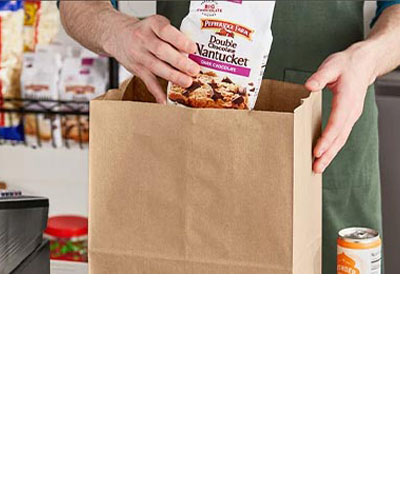
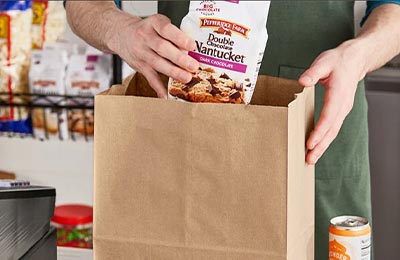
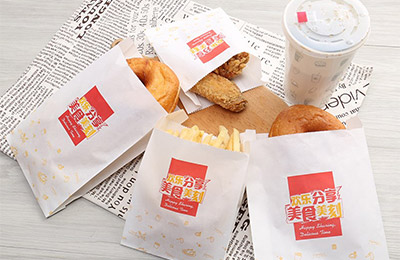
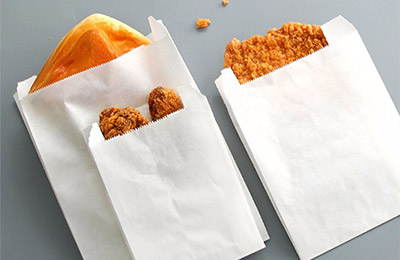
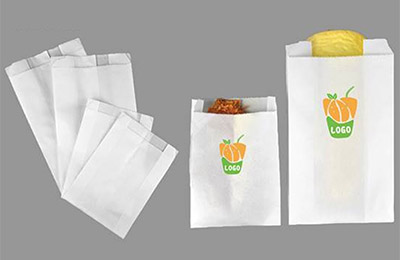
Adjustable Roll Feeding Common V Bottom Paper Bag Machine With Tracking is our new design food paper bag making machine, which used for KFC, Mcdonald's like chips, bakery and so on.

Automatic constant tension control for unwinding, Servo Motor system, motor for material feeding with inverter.

Main motor with inverter.

When there is no material, the machine automatically stops.

Open roller gluing forming system.

Side lay working table, easy operation.


Printing Machine Product Introduction


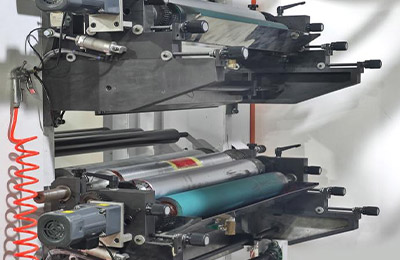
2 Colors Printing Online is a printing machine using photosensitive resin soft plate as the plate material, commonly known as "flexographic printing machine". It is suitable for printing on roll paper, non-woven fabric, polyethylene, polypropylene plastic bags, and other packaging materials. It is an ideal printing equipment for food paper packaging, supermarket handbags, vest bags, clothing bags, etc.


Printing Machine Features

Easy operation, soft start, accurate color registration.

The meter counter can set the printing quantity according to the requirements, and it will automatically stop when the number is reached, and it will stop automatically when the material is cut.

Manually raise and lower the printing plate cylinder, and the ink will be stirred automatically after lifting.

The anilox cylinder transfers ink, and the ink color is even.

Reliable drying system, coordinated with high-speed operation, will automatically cut off when the machine stops.

6.360-degree continuously adjustable longitudinal register device.

Variable frequency motor speed regulation, adapt to different printing speeds.

Jog and stop buttons are installed on the plate roller base and the receiving rack to facilitate the operation of the machine during plate loading.

Product Parameters
Paper Bag Machine


Model XKJD-400  
Paper bag length 120-450mm(L)
Paper bag width 70-260mm(W)
Paper thickness 40-80g/㎡
Machine Speed 60-500pcs/min
Paper roll width 200-740mm
Insert Paper Edge 20-100mm(2M)
Machine power 7.5kw
Machine weight 1850kg
Machine size 4640x1470x1700mm


Printing machine


TYPE XKFP2800 XKFP4800
Max. Printing material width 800mm 800mm
Max. Printing width 760mm 760mm
Printing length range 191-914mm 191-914mm
Printing speed 10-80m∕min 10-80m∕min
Register precision ≤±0.20mm ≤±0.20mm
Thickness of plate(including the thickness of double sides glue) 2.28mm 2.28mm
Total Power 10kw 10kw
Machine Weight 200kg 200kg
Printing materials paper, kraft paper, non-woven fabric, coated paper, film, aluminum foil, thin leather, etc. paper, kraft paper, non-woven fabric, coated paper, film, aluminum foil, thin leather, etc.
nner diameter of paper core 76mm 76mm
Transmission mode driven by helical gear driven by helical gear
Printing color 360 degree rotation 360 degree rotation
Adjustment method Manual Manual
Printing plate Resin offset plate Resin offset plate
Machine size 2300x2000x1920mm 3000x2225x1900mm
Product Details
Touch Screen Human-Computer Interface, operate and control easily.
Automatic constant tension control system,the tension is not bad from beginning to end.
Material handling adopts hydraulic lifting structure, and through magnetic powder braking, paper feeding is more stable.
Low voltage electrical apparatus can control and protect the operation of the machine, indicate and regulate the working condition of the machine
Adopt PLC motion controller to ensure high speed and stable operation.
The deviation correction device includes a controller, a deviation detection structure for detecting whether the paper is offset, and a deviation correction structure for adjusting the paper position.
The printing tracking photoelectric eye can realize the high-precision detection of the printed paper, such as the deviation of the printing position, the poor printing quality and so on.
Inverter according to the actual needs of the motor to provide its required power supply voltage and frequency
Paper bag counter, the machine automatically counts the number of paper bags out of the bag.
The servo motor can accurately control the speed, steering and position of the motor, and has self-diagnosis and protection functions to ensure the safe operation of the equipment. It has precise positioning and control, better torque performance, reduced mechanical structure complexity, improved automation, and increased equipment life.
The printing press part is composed of ink roller, mesh roller and plate roller, which can print pattern/word /logo to paper bag according to actual needs.
FAQ
Adjustable Roll Feeding Common V Bottom Paper Bag Machine With Tracking + 2 Colors Printing Online

Usually we quote within 24 hours after we get your inquiry.

What is the price of shipping?

Depending upon the port of delivery, prices varies.

How long can we get the goods?

For standard machine, we usually delivery in three weeks. Customized machine delivery in 30-60 days.

More news you want to know
/
Oct 22,2025
How to make a paper bag?

In daily life, paper bags are practical and environmentally friendly, and they can also show personal creativity through handmade production. In fact, to make a paper bag, you only need to prepare kraft paper, scissors, glue, and a ruler. Cut the paper as needed, fold the short side and glue it to make the bottom, fold the remaining paper and glue it to the side, punch holes and thread ribbons to make handles, and you can also decorate it, and a simple paper bag is ready. This is the basic principle of making a paper bag, so let's introduce in detail how to make a favorite paper bag.

I. Materials Preparation


  1. Paper Selection

    • Kraft paper is a classic choice. It's tough and durable, with a rustic texture, making it an excellent option for daily shopping bags and document bags. It can bear a certain weight without easily tearing, suitable for carrying office supplies or a few magazines.

    • Cardstock, with its considerable thickness and stiffness, is perfect for creating gift bags, instantly adding an elegant look to the presents and enhancing their overall quality.

    • Wrapping paper comes in a myriad of patterns and vibrant colors. If you're aiming for a unique decorative effect or making themed paper bags like holiday gift bags or children's craft bags, wrapping paper will meet your needs.

    • Depending on the intended use and size of the paper bag, choose the appropriate paper size. For small memo bags or snack bags, an A4 paper (210mm×297mm) suffices; for medium-sized daily shopping bags, a square paper with a side length of 40 - 50 centimeters is more appropriate; for large storage bags or moving bags, you'll need an even larger paper.

  2. Tool Gathering

    • A pair of sharp scissors is essential. Only with sharp scissors can you ensure that the cut edges of the paper are neat and free from roughness or jaggedness that would otherwise affect the bag's appearance.

    • Glue or glue sticks. Glue has strong adhesion and is suitable for large-area pasting to stabilize the bag's structure. Glue sticks are convenient to use and are handy for precise gluing in delicate areas, such as the folded corners at the bottom of the bag.

    • A ruler is used to accurately measure the paper dimensions, guaranteeing that each part of the bag is in the right proportion and forms neatly.

    • If you plan to add handles to the bag, a hole punch and ribbons are must-haves. The hole punch can quickly and accurately make holes, and the ribbons give the handles an elegant touch. If you also want to beautify the bag, tools like colored pens, stickers, and stamps should also be prepared.


II. Production Process


  1. Precise Cutting

    • First, determine the design dimensions of the paper bag. For example, if you want to make a regular paper bag with a bottom width of 10 cm, a body width of 15 cm, and a height of 20 cm, you need to cut a rectangular piece of paper. The length is calculated as (bottom width + body width) × 2 + reserved gluing margin (assume 2 cm), that is, (10 + 15) × 2 + 2 = 52 cm, and the width is the bag height + reserved gluing margin, that is, 20 + 2 = 22 cm. Use the ruler to measure carefully and then cut precisely with the scissors.

  2. Skillful Bottom Building

    • Fold the short side of the cut rectangular paper upward, with the folding width being half of the bottom width. In this case, it's 5 cm. Apply glue at the folding point and press firmly. This forms half of the bottom of the paper bag. Do the same for the other short side to make the bottom a complete rectangle. In this way, the bottom of the bag is stable and flat, capable of holding items steadily.

  3. Standing up the Sides

    • Fold the remaining part of the paper upward along the bottom to form the sides of the paper bag. At the junction of the sides, apply glue evenly and smooth it gently to make the sides stand upright vertically. The paper bag is initially formed. At this time, pay attention to the flatness of the sides and try your best to avoid wrinkles.

  4. Clever Handle Addition

    • If you need handles, there are several ways to make them. Use a hole punch to make symmetrical holes on both sides of the upper part of the paper bag. The hole spacing is adjusted according to the size of the bag. For small bags, it's 3 - 4 cm; for medium-sized bags, it's 4 - 6 cm; for large bags, it's 6 - 8 cm. Then select an appropriate length of ribbon, pass it through the holes, and tie knots at both ends. The length of the ribbon depends on the size of the bag. For small bags, it's 20 - 30 cm; for medium-sized bags, it's 30 - 40 cm; for large bags, it's 40 - 50 cm. If you don't have a hole punch, you can also directly glue the ribbon to the upper inner edge of the paper bag, which can also achieve the handle function.

  5. Creative Decoration

    • After the basic formation of the paper bag, you can start the creative decoration journey. Use colored pens to paint on the surface of the paper bag, drawing dreamy starry skies or lively little animals; or stick on interesting stickers, like cute cartoon characters, beautiful flowers and plants; you can also use stamps to print out retro patterns or personalized letters, making the paper bag transform into a unique work of art.


Through the above steps, paper bags full of heart and creativity can be born in your hands. Whether for personal use, giving as gifts, or decorating life, they all have a special charm. Why not give it a try in your spare time and enjoy the fun of handicrafts? If you want to know more about making paper bags, you can check out our Paper bag machine, we have more detailed details

/Printing machine failure and solution
Oct 11,2025
Printing machine failure and solution

For printing factory owners, nothing is more stressful than a sudden printing machine failure. Last month, a Guangzhou-based printer told us: their 4-color offset press stopped mid-production, leaving 30k magazine orders pending. After 3 days of messy repairs, they lost not only $8k in direct costs but also a long-term client.

If you’ve ever faced “printing machine down” panic, you know: every minute of downtime eats into profits. The good news? Most printing machine failures have predictable causes—and actionable solutions. Today, we’ll break down the most common printing machine failures, step-by-step troubleshooting tips, and how to get back to production fast (plus, how to prevent future breakdowns).

pro-list-5.png

Flexo Printing machine

Why Printing Machine Failure Hurts More Than You Think

Before diving into solutions, let’s talk about the cost of inaction. A mid-sized printing machine (e.g., 100m/min web press) runs 16 hours a day, producing \(3k–\)5k worth of prints hourly. A single failure that lasts 24 hours? That’s \(48k–\)80k in lost revenue. Worse, if the failure delays time-sensitive orders (like textbooks, holiday flyers, or packaging), you risk losing clients forever.

The biggest mistake many printers make? Waiting until a failure happens to look for printing machine failure and solution resources. By then, the damage is already done. Let’s fix that—starting with the 3 most common printing machine failures and how to solve them.


3 Common Printing Machine Failures & Their Fast Solutions

Whether you run a small digital printer or a large industrial offset press, these failures top the list. Follow these steps to cut troubleshooting time by 70%.

1. Transmission System Failure

Symptoms: Machine stops abruptly, displays “transmission error,” or makes grinding noises.

Why it happens: Worn gears, loose belts, or sensor misalignment (common in presses used 8+ hours daily).

Step-by-step solution:

  • First, shut down the machine and disconnect power (safety first!).

  • Inspect the transmission gears and belts for cracks, wear, or slack—replace if damaged.

  • Use a calibration tool to realign the transmission sensor (misalignment causes 60% of transmission errors).

  • Test run with 50 sheets of paper—if no errors, resume production.

Pro tip: If you’re unsure about sensor calibration, professional teams (like ours) offer 2-hour on-site support for transmission system issues—avoid costly trial-and-error.


2. Main Control Board Malfunction

The main control board is your printing machine’s “brain”—a malfunction here means full shutdown.

Symptoms: Blank display, unresponsive buttons, or “system crash” alerts.

Why it happens: Overheating (from poor ventilation), power surges, or old components (boards last 3–5 years on average).

Step-by-step solution:

  • Check the control board for burnt chips or loose wires—if you see burns, replace the board immediately (never repair a burnt board!).

  • If no visible damage, use a diagnostic tool to read error logs (most modern presses have built-in log systems).

  • Import original machine parameters into the new board (critical! Wrong parameters cause paper jams or misprints).

  • Run a 1-hour test with different paper types to ensure compatibility.

Pain point solved: Many printers struggle with finding replacement boards—we stock 200+ models of printing machine main control boards, with next-day delivery to 90% of regions.

3. Sensor Failure

Sensors monitor paper position, speed, and temperature—even a tiny sensor issue causes big problems.

Symptoms: Paper misalignment, uneven ink coverage, or “temperature too high” false alerts.

Why it happens: Dust buildup, oil stains, or long-term exposure to ink fumes.

Step-by-step solution:

  • Turn off the machine and clean the sensor with a lint-free cloth (avoid water—use alcohol-based cleaner).

  • Check the sensor’s wiring for frays—reconnect loose wires or replace damaged cables.

  • Calibrate the sensor using the machine’s “calibration mode” (follow the user manual, or ask for our free calibration guide).

Prevention trick: Wipe sensors daily during machine maintenance—this reduces sensor failures by 80%.


When to Call a Professional for Printing Machine Failure?

If you’ve tried the above steps and still face issues—don’t waste time! Professional technicians can:

  • Diagnose hidden failures (e.g., internal wiring issues) in 30 minutes.
  • Provide original replacement parts (no cheap knockoffs that cause repeat failures).
  • Offer post-repair training to your team (so you can handle small issues next time).

We’ve helped 500+ printers recover from failures fast—last week, a Shenzhen printer with a 48-hour shutdown got back to production in 6 hours with our support.


Final Tip: Prevent Printing Machine Failure Before It Happens

The best printing machine failure and solution is prevention:

  1. Keep a “critical parts kit” (main control board, sensor, belt) on hand.
  1. Inspect the machine daily (focus on transmission, control board, and sensors).
  1. Schedule quarterly professional maintenance (this cuts failure rates by 65%).


If you’re ready to stop worrying about printing machine failures and keep your production running—contact Xinke today. We offer free failure assessments, fast replacement parts, and 24/7 emergency repair services. Let’s turn downtime into uptime!

/Flexo Printing Machine
Sep 26,2025
Flexographic Printing Process Guide

If you’ve searched for “flexographic printing process steps,” “how does flexographic printing work,” or “flexographic printing guide for beginners,” you’re likely exploring this versatile printing method—widely used for packaging, labels, and more. Flexographic printing (often called “flexo”) is valued for its speed, adaptability to diverse materials, and cost-effectiveness, but understanding its process can be confusing for new learners. This guide breaks down the flexographic printing process step-by-step, answers key questions, and covers critical details for businesses and professionals.

This guide provides a clear, step-by-step overview of the modern flexographic workflow, from raw material to finished product.

To illustrate the process, here is a typical workflow for a multi-color print job:

Roll of Substrate (e.g., Paper, Film, Label Stock) → Unwinding & Tension Control → Web Guiding (EPC) → Surface Treatment (if required) → Sequential Printing & Drying (Color 1, 2, 3, 4...) → Cooling → In-line Finishing (e.g., Die-Cutting, Slitting) → Rewinding into Finished Rolls

Recommended Flexo Printing Machines:

  • Two Color Flexo Printing Machine: XKFP-2800 Two Color Flexo Printing Machine adopts with synchronous belt drive and hard gear face gear box. The gear box adopt with synchronous belt drive each printing group high precision planetary gear oven(360º adjust the plate) gear driving the press printing roller.

  • Separate Two Color Flexo Printing Machine: XKFP-2800 Separate Two Color Flexo Printing Machine can print two colors simultaneously or separately. It is equipped with a high-precision transmission system and printing unit to meet the needs of complex patterns and colors. It can be applied to printing on a variety of materials. It adopts advanced control system and human-machine interface, which is easy to operate, maintain and adjust.

  • Separate Four Color Flexo Printing Machine: XKFP-4800 Separate Four Color Flexo Printing Machine is equipped with four independent printing units, supporting CMYK four-color printing or custom color combination to achieve rich color effects. It adopts high-precision transmission system and printing unit to ensure the image clarity of printed products. Its maximum printing width can reach 4800mm, which is widely used in packaging printing, label printing, advertising printing, publication printing and other fields.

  • Separate Six Color Flexo Printing Machine: The XKFP-6800 Separate Six Color Flexo Printing Machine is equipped with six independent printing units that can control different colors of ink separately to achieve precise six-color printing and meet the needs of complex patterns and color levels. It is suitable for the production of packaging, labels, advertisements and other printed products that require high color and printing accuracy.

Latest Trends in Flexographic Printing (2024)

To boost SEO relevance, include “flexographic printing trends 2024”—a rising search term:

  • Eco-Friendly Practices: Water-based and soy-based inks, recyclable substrates, and plate materials that reduce waste.

  • Digital Integration: “Digital flexographic printing” combines flexo’s speed with digital’s customization (e.g., variable data printing for personalized labels).

  • High-Speed Automation: New presses with auto-plate mounting and real-time quality checks (reduces setup time by 30% vs. traditional flexo).


Common Flexographic Printing Issues & Solutions

Addressing “flexographic printing problems” helps users solve real pain points, reducing bounce rate:

  • Ink Smudging: Solution: Use faster-drying inks (e.g., UV-curable) or increase drying time.

  • Misaligned Colors: Solution: Calibrate plate alignment and web tension.

  • Uneven Ink Coverage: Solution: Clean anilox rollers (clogged cells cause uneven ink) or adjust doctor blade pressure.


Final Takeaway: Is Flexographic Printing Right for You?

The flexographic printing process is ideal if you need:

  • Fast, cost-effective printing for packaging, labels, or flexible substrates.

  • Adaptability to materials like plastic, paper, or foil.

  • Small-to-large run capabilities (lower setup costs than gravure).


Whether you're a small business owner looking into short-run flexographic printing or a professional learning the process, this guide covers the core steps and details to get started. For more insights, such as "How to Choose Flexographic Ink" or "Flexographic Press Maintenance Tips," please contact Xinke.

GET A QUOTE

GET IN TOUCH NOW
Captcha Code
We value your privacy
We use cookies to provide you with a better online experience, analyse and measure website usage, and assist in our marketing efforts.
Accept All