Where Do Paper Bags Come From?

Mar 06, 2025

In our daily lives, paper bags are everywhere. Whether we're shopping at the supermarket, carrying gifts, or packing food from a restaurant, they play a vital role. But where do these seemingly ordinary paper bags actually come from? Behind their creation lies a series of complex and fascinating processes.

Sources of Raw Materials

Tree Resources

The main raw material for the vast majority of paper bags is pulp, and the primary source of pulp is trees. There are numerous tree species suitable for papermaking. Coniferous trees such as spruce and pine, and deciduous trees like birch and eucalyptus are common choices. These trees grow in forests around the world, providing a continuous supply of resources for the paper industry. Forest management is of great importance. The development of sustainable forestry ensures a balance between tree felling and planting to maintain the stability of the ecological environment. For example, in some large forest farms, for every tree cut down, multiple new saplings are planted to ensure the renewability of forest resources.

Recycled Fibers

In addition to virgin trees, the proportion of recycled fibers in paper bag production is also increasing. Waste paper in daily life, such as old newspapers, magazines, and office paper, can all become valuable raw materials for making paper bags. Recycled fibers not only reduce the demand for new trees and relieve the pressure on forests but also significantly cut down on energy consumption and greenhouse gas emissions. Many cities have established a comprehensive paper recycling system. Residents sort and dispose of waste paper, and recycling companies collect and process it, converting these discarded papers back into usable pulp.


From Raw Materials to Pulp

Mechanical Pulping

Mechanical pulping is one of the methods to directly process wood into pulp. In this process, the logs are first debarked, and then through mechanical devices such as grinders, the wood is ground into fine fibers. This method can retain more lignin in the wood, and the produced pulp has high strength, making it suitable for manufacturing some paper bags with high strength requirements, such as packaging paper bags for industrial products. However, mechanical pulping consumes a large amount of energy, and the produced paper is darker in color and usually requires subsequent bleaching treatment.

Chemical Pulping

Chemical pulping, on the other hand, uses chemical agents to separate cellulose from other components in the wood. Common chemical pulping methods include the kraft process and the sulfite process. In the kraft process, the wood is cut into small pieces and mixed with chemical drugs such as sodium hydroxide and sodium sulfide and cooked under high temperature and pressure. This method can effectively remove lignin, and the produced pulp has high whiteness and fine fibers, making it suitable for manufacturing high-quality paper bags, such as high-end gift bags and food packaging bags. Although chemical pulping can obtain high-quality pulp, the wastewater generated contains a large number of chemical substances and needs to be treated strictly before being discharged to protect the environment.

Turning Pulp into Paper

After a series of pretreatment processes such as screening and purification, the pulp enters the papermaking stage. The paper machine is the key equipment for converting pulp into paper. The pulp is diluted into a low-concentration suspension and then evenly distributed on the wire section of the paper machine. As the paper machine operates, the water is filtered out through the small holes in the wire section, and the fibers gradually interweave to form a wet paper web. The wet paper web then undergoes processes such as pressing and drying to further remove water, and finally, paper with a certain strength and thickness is formed. With the continuous development of modern papermaking technology, the efficiency of paper machines and the quality of paper have been greatly improved, enabling the production of papers with different specifications and properties to meet the various needs of paper bag production.

Processing Paper into Paper Bags

Printing and Design

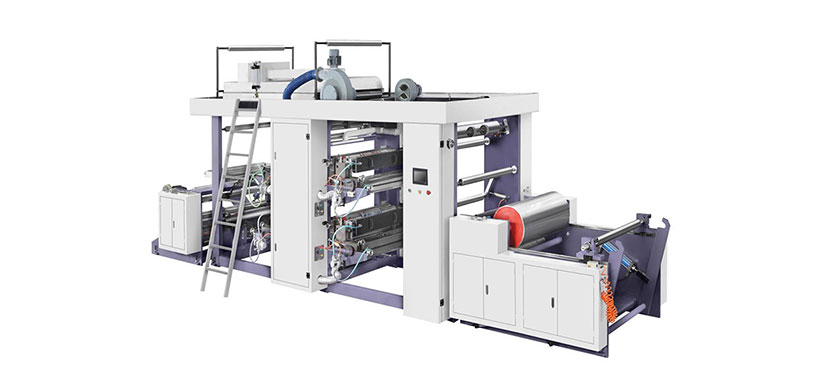
Once the paper is produced, printing and design are carried out first. There are a variety of printing processes for paper bags, such as offset printing, flexographic printing, and screen printing. During the printing process, according to the customer's requirements, brand logos, patterns, text, and other information are printed on the paper, giving the paper bag a unique appearance and promotional function. The design team will carefully design the patterns and layout according to the purpose of the paper bag and the target market, making the paper bag not only practical but also aesthetically appealing and attractive. For example, gift paper bags may adopt exquisite patterns and gold stamping processes, while supermarket shopping bags focus more on clear information display.

Cutting and Shaping

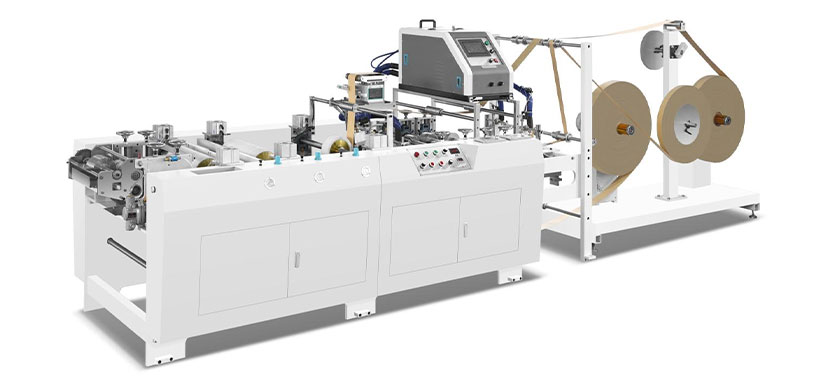
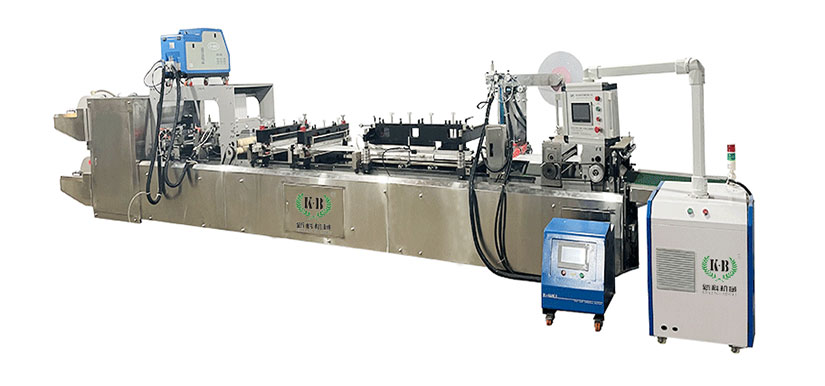
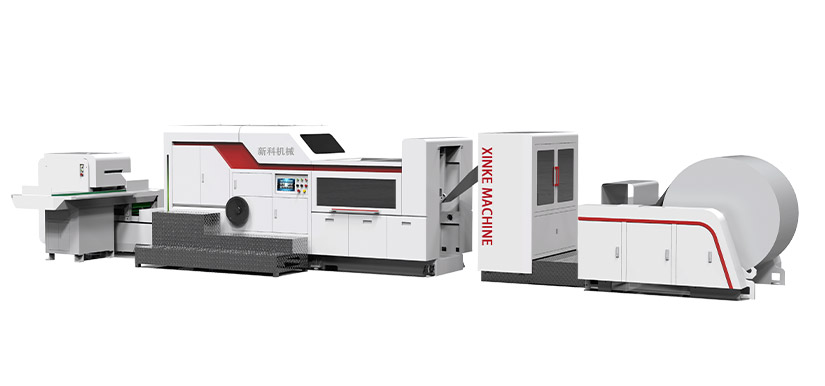
After printing, the paper is cut into the right size, and then folded, glued and made into the shape of a paper bag. Paper bags come in different shapes and structures, including flat bags, tote bags, envelope bags, etc. During the production process, special paper bag making equipment is needed to ensure that the paper bags are accurate in size and have neat edges. Our Paper bag machine, Handle Sticking Machine can complete all the above details. For example, the handle part of a tote bag needs to be firmly installed on the bag body to ensure that it can withstand a certain weight. Some complex paper bags may also need to add lining or other auxiliary materials to enhance its performance and protect the items inside.

XKJD-400 Adjustable Roll Feeding Common V Bottom Paper Bag Machine With Tracking

Quality Inspection and Packaging

Finally, the produced paper bags need to go through strict quality inspection. The inspection content includes aspects such as the strength of the paper bag, printing quality, and dimensional accuracy. Only paper bags that meet the quality standards can enter the market for sale. Qualified paper bags are neatly packaged and shipped to various merchants and consumers. Quality inspection is not only a guarantee of product quality but also a protection of consumer rights and interests, ensuring that the paper bag can perform its proper function during use.

XKBS-02 Flat Paper Handle Making Machine

In short, paper bags are mainly made from pulp that is mechanically or chemically pulped, then processed into paper, and then made through processes such as printing and cutting. Finally, quality inspection is required to complete the finished product.

From the trees in the forest to the paper bags in our hands, this process goes through multiple stages and complex techniques. The production of paper bags not only relies on rich natural resources but also benefits from advanced technology and strict quality control. At the same time, the use of recycled fibers also reflects the concept of sustainable development, allowing us to enjoy the convenience brought by paper bags while also contributing to environmental protection.


Main News
How to Operate Flexo Printing Machine?
2025 / 11 / 11

With the booming demand for flexible packaging in food, beverage, and consumer goods industries, flexo printing machines have become indispensable equipment for high-efficiency, high-quality printing. As digital transformation accelerates in the printing sector, mastering the standard operation of flexo printers not only ensures production safety but also optimizes print precision and reduces material waste. This article, based on 2024 industry operation standards and expert insights, details the step-by-step operation process, safety norms, and key optimization tips for flexo printing machines.


I. Pre-Operation Preparation: Lay the Foundation for Stable Printing

1. Equipment Inspection & Calibration

Before starting the machine, conduct a comprehensive check to eliminate potential risks:

  • Mechanical components: Inspect the anilox roll (cleanliness and mesh integrity), doctor blade (no cracks or wear), printing plate cylinder (firm installation, no deformation), and guide rollers (smooth rotation without jamming). For digital flexo printers, calibrate the servo motor and encoder to ensure accurate speed synchronization.

  • Fluid systems: Check the ink tank (sufficient ink volume, no sediment), ink circulation pipeline (no leaks), and solvent ratio (compliant with ink type—e.g., water-based inks require deionized water blending). In 2024, eco-friendly water-based inks account for over 65% of flexo printing applications, so ensure pH value (6.5–8.0) meets environmental standards.

  • Electrical & control systems: Verify the touchscreen display, emergency stop button, and safety interlocks (e.g., protective covers, infrared sensors) are functional. Connect the machine to a stable power supply and test the air compressor (pressure 0.6–0.8 MPa) for pneumatic components.

2. Material Preparation & Pretreatment

  • Substrate selection: Confirm the substrate (plastic film, paper, non-woven fabric) matches the printing plate and ink. For example, BOPP film requires corona treatment (surface tension ≥38 dynes/cm) to enhance ink adhesion—neglecting this step causes poor print fastness.

  • Ink adjustment: Stir the ink thoroughly to avoid color unevenness; add curing agents or thinners as needed (follow the manufacturer’s ratio). For spot colors, use a spectrophotometer to calibrate color accuracy, ensuring consistency with sample standards.

pro-list-5.png

II. Step-by-Step Operation Process of Flexo Printing Machine

1. Startup & Parameter Setting

  • Turn on the main power switch, start the control system, and wait for the machine to initialize (usually 2–3 minutes). On the touchscreen, input key parameters:

    • Printing speed: 50–200 m/min (adjust based on substrate type—paper allows higher speed than thin plastic film).

    • Pressure adjustment: Set the plate cylinder pressure (0.1–0.3 MPa) and anilox roll pressure (0.05–0.15 MPa) to avoid plate wear or ink bleeding.

    • Drying temperature: 40–80°C (water-based inks require lower temperature than solvent-based inks to prevent substrate shrinkage).

  • Activate the ink circulation system and preheat the drying oven to the set temperature.

2. Test Printing & Pattern Alignment

  • Feed the substrate through the unwinding unit, guide rollers, and printing station. Start the machine at low speed (30–50 m/min) for test printing.

  • Check the printed sample for:

    • Color accuracy: Compare with the standard sample using a colorimeter; adjust ink concentration or anilox roll mesh size if there’s deviation.

    • Registration precision: Ensure multi-color patterns are aligned (error ≤±0.1 mm). Use the machine’s automatic registration function (standard in 2024 smart flexo printers) to correct horizontal/vertical offsets.

    • Ink adhesion: Perform a tape test—stick adhesive tape on the printed surface and tear it off; no ink transfer indicates qualified adhesion.

3. Formal Printing & Real-Time Monitoring

  • After confirming test printing meets requirements, gradually increase the speed to the set value. Assign operators to monitor the production line continuously:

    • Check ink supply: Ensure consistent ink flow to avoid dry spots or blurring.

    • Inspect substrate tension: Maintain stable tension (2–5 N) to prevent wrinkling or stretching.

    • Monitor drying effect: Touch the printed substrate to confirm no stickiness; adjust drying temperature or speed if needed.

  • For large-batch production, sample every 500 meters for quality inspection, recording parameters such as color density and registration error.


4. Shutdown & Post-Operation Maintenance

  • After printing, reduce the machine speed to zero and turn off the ink circulation system.

  • Clean the anilox roll, doctor blade, and printing plate immediately: Use appropriate cleaning agents (water for water-based inks, special solvents for solvent-based inks) to remove residual ink—this extends the service life of components by 30% according to industry data.

  • Turn off the power, air compressor, and drying oven. Organize the printed products and waste materials, and record the operation log (production volume, parameters, quality issues).


III. Safety Operation Guidelines & Common Troubleshooting

1. Non-Negotiable Safety Norms

  • Operators must wear protective equipment (gloves, goggles, anti-slip shoes) to avoid ink contact or mechanical injury.

  • Never touch rotating components (guide rollers, cylinders) during operation; use tools for adjustments instead of hands.

  • In case of jamming or equipment failure, press the emergency stop button immediately—do not attempt to handle while the machine is running.

2. Common Issues & Solutions

  • Ink bleeding: Reduce printing speed, adjust pressure between anilox roll and plate cylinder, or replace with finer mesh anilox roll.

  • Poor registration: Calibrate the servo motor, check substrate tension, or replace worn guide rollers.

  • Substrate wrinkling: Adjust the unwinding/rewinding tension, flatten the substrate before feeding, or check for uneven guide roller alignment.


IV. 2024 Flexo Printing Machine Operation Trends: Intelligence & Eco-Friendliness

Industry experts point out that modern flexo printing operations are increasingly integrated with digital technology. The latest smart flexo printers in 2024 feature AI-based quality inspection systems, which automatically detect printing defects (e.g., ink spots, missing patterns) and adjust parameters in real time—reducing manual intervention by 40%. Additionally, with global environmental regulations tightening, operators must master water-based ink operation skills and energy-saving settings (e.g., variable frequency speed control, heat recovery systems) to meet carbon emission standards.

“Standardized operation is the key to balancing efficiency and quality,” says Mark Johnson, a senior printing technician with 15 years of experience. “Operators should not only master basic steps but also keep up with technological upgrades, such as learning to operate cloud-based parameter management systems, to stay competitive in the industry.”


Conclusion

Mastering the operation of flexo printing machines requires a combination of theoretical knowledge, practical skills, and safety awareness. From pre-operation inspection to post-maintenance, every step affects printing quality and production efficiency. With the industry moving toward intelligence and eco-friendliness, operators must continuously update their skills to adapt to new equipment and standards. By following the guide above, you can ensure stable operation, reduce costs, and achieve high-quality printing results—laying a solid foundation for business development in the flexible packaging sector.

For more industry insights and equipment operation tips, stay tuned to our latest reports!

How to make a paper bag?
2025 / 10 / 22

In daily life, paper bags are practical and environmentally friendly, and they can also show personal creativity through handmade production. In fact, to make a paper bag, you only need to prepare kraft paper, scissors, glue, and a ruler. Cut the paper as needed, fold the short side and glue it to make the bottom, fold the remaining paper and glue it to the side, punch holes and thread ribbons to make handles, and you can also decorate it, and a simple paper bag is ready. This is the basic principle of making a paper bag, so let's introduce in detail how to make a favorite paper bag.

I. Materials Preparation


  1. Paper Selection

    • Kraft paper is a classic choice. It's tough and durable, with a rustic texture, making it an excellent option for daily shopping bags and document bags. It can bear a certain weight without easily tearing, suitable for carrying office supplies or a few magazines.

    • Cardstock, with its considerable thickness and stiffness, is perfect for creating gift bags, instantly adding an elegant look to the presents and enhancing their overall quality.

    • Wrapping paper comes in a myriad of patterns and vibrant colors. If you're aiming for a unique decorative effect or making themed paper bags like holiday gift bags or children's craft bags, wrapping paper will meet your needs.

    • Depending on the intended use and size of the paper bag, choose the appropriate paper size. For small memo bags or snack bags, an A4 paper (210mm×297mm) suffices; for medium-sized daily shopping bags, a square paper with a side length of 40 - 50 centimeters is more appropriate; for large storage bags or moving bags, you'll need an even larger paper.

  2. Tool Gathering

    • A pair of sharp scissors is essential. Only with sharp scissors can you ensure that the cut edges of the paper are neat and free from roughness or jaggedness that would otherwise affect the bag's appearance.

    • Glue or glue sticks. Glue has strong adhesion and is suitable for large-area pasting to stabilize the bag's structure. Glue sticks are convenient to use and are handy for precise gluing in delicate areas, such as the folded corners at the bottom of the bag.

    • A ruler is used to accurately measure the paper dimensions, guaranteeing that each part of the bag is in the right proportion and forms neatly.

    • If you plan to add handles to the bag, a hole punch and ribbons are must-haves. The hole punch can quickly and accurately make holes, and the ribbons give the handles an elegant touch. If you also want to beautify the bag, tools like colored pens, stickers, and stamps should also be prepared.


II. Production Process


  1. Precise Cutting

    • First, determine the design dimensions of the paper bag. For example, if you want to make a regular paper bag with a bottom width of 10 cm, a body width of 15 cm, and a height of 20 cm, you need to cut a rectangular piece of paper. The length is calculated as (bottom width + body width) × 2 + reserved gluing margin (assume 2 cm), that is, (10 + 15) × 2 + 2 = 52 cm, and the width is the bag height + reserved gluing margin, that is, 20 + 2 = 22 cm. Use the ruler to measure carefully and then cut precisely with the scissors.

  2. Skillful Bottom Building

    • Fold the short side of the cut rectangular paper upward, with the folding width being half of the bottom width. In this case, it's 5 cm. Apply glue at the folding point and press firmly. This forms half of the bottom of the paper bag. Do the same for the other short side to make the bottom a complete rectangle. In this way, the bottom of the bag is stable and flat, capable of holding items steadily.

  3. Standing up the Sides

    • Fold the remaining part of the paper upward along the bottom to form the sides of the paper bag. At the junction of the sides, apply glue evenly and smooth it gently to make the sides stand upright vertically. The paper bag is initially formed. At this time, pay attention to the flatness of the sides and try your best to avoid wrinkles.

  4. Clever Handle Addition

    • If you need handles, there are several ways to make them. Use a hole punch to make symmetrical holes on both sides of the upper part of the paper bag. The hole spacing is adjusted according to the size of the bag. For small bags, it's 3 - 4 cm; for medium-sized bags, it's 4 - 6 cm; for large bags, it's 6 - 8 cm. Then select an appropriate length of ribbon, pass it through the holes, and tie knots at both ends. The length of the ribbon depends on the size of the bag. For small bags, it's 20 - 30 cm; for medium-sized bags, it's 30 - 40 cm; for large bags, it's 40 - 50 cm. If you don't have a hole punch, you can also directly glue the ribbon to the upper inner edge of the paper bag, which can also achieve the handle function.

  5. Creative Decoration

    • After the basic formation of the paper bag, you can start the creative decoration journey. Use colored pens to paint on the surface of the paper bag, drawing dreamy starry skies or lively little animals; or stick on interesting stickers, like cute cartoon characters, beautiful flowers and plants; you can also use stamps to print out retro patterns or personalized letters, making the paper bag transform into a unique work of art.


Through the above steps, paper bags full of heart and creativity can be born in your hands. Whether for personal use, giving as gifts, or decorating life, they all have a special charm. Why not give it a try in your spare time and enjoy the fun of handicrafts? If you want to know more about making paper bags, you can check out our Paper bag machine, we have more detailed details

Printing machine failure and solution
2025 / 10 / 11

For printing factory owners, nothing is more stressful than a sudden printing machine failure. Last month, a Guangzhou-based printer told us: their 4-color offset press stopped mid-production, leaving 30k magazine orders pending. After 3 days of messy repairs, they lost not only $8k in direct costs but also a long-term client.

If you’ve ever faced “printing machine down” panic, you know: every minute of downtime eats into profits. The good news? Most printing machine failures have predictable causes—and actionable solutions. Today, we’ll break down the most common printing machine failures, step-by-step troubleshooting tips, and how to get back to production fast (plus, how to prevent future breakdowns).

pro-list-5.png

Flexo Printing machine

Why Printing Machine Failure Hurts More Than You Think

Before diving into solutions, let’s talk about the cost of inaction. A mid-sized printing machine (e.g., 100m/min web press) runs 16 hours a day, producing \(3k–\)5k worth of prints hourly. A single failure that lasts 24 hours? That’s \(48k–\)80k in lost revenue. Worse, if the failure delays time-sensitive orders (like textbooks, holiday flyers, or packaging), you risk losing clients forever.

The biggest mistake many printers make? Waiting until a failure happens to look for printing machine failure and solution resources. By then, the damage is already done. Let’s fix that—starting with the 3 most common printing machine failures and how to solve them.


3 Common Printing Machine Failures & Their Fast Solutions

Whether you run a small digital printer or a large industrial offset press, these failures top the list. Follow these steps to cut troubleshooting time by 70%.

1. Transmission System Failure

Symptoms: Machine stops abruptly, displays “transmission error,” or makes grinding noises.

Why it happens: Worn gears, loose belts, or sensor misalignment (common in presses used 8+ hours daily).

Step-by-step solution:

  • First, shut down the machine and disconnect power (safety first!).

  • Inspect the transmission gears and belts for cracks, wear, or slack—replace if damaged.

  • Use a calibration tool to realign the transmission sensor (misalignment causes 60% of transmission errors).

  • Test run with 50 sheets of paper—if no errors, resume production.

Pro tip: If you’re unsure about sensor calibration, professional teams (like ours) offer 2-hour on-site support for transmission system issues—avoid costly trial-and-error.


2. Main Control Board Malfunction

The main control board is your printing machine’s “brain”—a malfunction here means full shutdown.

Symptoms: Blank display, unresponsive buttons, or “system crash” alerts.

Why it happens: Overheating (from poor ventilation), power surges, or old components (boards last 3–5 years on average).

Step-by-step solution:

  • Check the control board for burnt chips or loose wires—if you see burns, replace the board immediately (never repair a burnt board!).

  • If no visible damage, use a diagnostic tool to read error logs (most modern presses have built-in log systems).

  • Import original machine parameters into the new board (critical! Wrong parameters cause paper jams or misprints).

  • Run a 1-hour test with different paper types to ensure compatibility.

Pain point solved: Many printers struggle with finding replacement boards—we stock 200+ models of printing machine main control boards, with next-day delivery to 90% of regions.

3. Sensor Failure

Sensors monitor paper position, speed, and temperature—even a tiny sensor issue causes big problems.

Symptoms: Paper misalignment, uneven ink coverage, or “temperature too high” false alerts.

Why it happens: Dust buildup, oil stains, or long-term exposure to ink fumes.

Step-by-step solution:

  • Turn off the machine and clean the sensor with a lint-free cloth (avoid water—use alcohol-based cleaner).

  • Check the sensor’s wiring for frays—reconnect loose wires or replace damaged cables.

  • Calibrate the sensor using the machine’s “calibration mode” (follow the user manual, or ask for our free calibration guide).

Prevention trick: Wipe sensors daily during machine maintenance—this reduces sensor failures by 80%.


When to Call a Professional for Printing Machine Failure?

If you’ve tried the above steps and still face issues—don’t waste time! Professional technicians can:

  • Diagnose hidden failures (e.g., internal wiring issues) in 30 minutes.
  • Provide original replacement parts (no cheap knockoffs that cause repeat failures).
  • Offer post-repair training to your team (so you can handle small issues next time).

We’ve helped 500+ printers recover from failures fast—last week, a Shenzhen printer with a 48-hour shutdown got back to production in 6 hours with our support.


Final Tip: Prevent Printing Machine Failure Before It Happens

The best printing machine failure and solution is prevention:

  1. Keep a “critical parts kit” (main control board, sensor, belt) on hand.
  1. Inspect the machine daily (focus on transmission, control board, and sensors).
  1. Schedule quarterly professional maintenance (this cuts failure rates by 65%).


If you’re ready to stop worrying about printing machine failures and keep your production running—contact Xinke today. We offer free failure assessments, fast replacement parts, and 24/7 emergency repair services. Let’s turn downtime into uptime!

GET A QUOTE

GET IN TOUCH NOW
Captcha Code
Exhibitions
We value your privacy
We use cookies to provide you with a better online experience, analyse and measure website usage, and assist in our marketing efforts.
Accept All